
Get the Perfect Fit
Getting your sizing right makes all the difference. Follow these simple steps and your nails will fit like they were made for you — because they were!
All you need is a coin (a quarter or dime works perfectly), a flat hard surface, and your phone camera. No ruler or tape measure required!
Make sure your hands are clean and your nails are free of old polish so the edges are clearly visible.
Push your cuticles back gently so the full width of each nail is visible. Trim or file to your natural edge first — don't measure on top of grown-out nails.
If you have long natural nails, trim them to a short, natural length before measuring. I size the press-on to your natural nail bed, not your current nail length.
Place your coin flat on a hard surface. Rest your four fingers (index, middle, ring, and pinky) flat right next to it. The coin gives me a reference scale to measure each nail accurately.
A quarter or dime works great. Make sure the coin is on the same flat surface as your fingers — not elevated.
Hold your phone directly above your hand and take a clear, well-lit photo from directly overhead. All four fingers and the full coin must be visible in the frame. In a separate photo, place your thumb flat next to the coin and take another photo. Thumbs should be photographed separately so they are flat and clearly viewed.
Natural lighting is best. Avoid shadows — they make it hard to see nail edges. Take 2–3 photos and choose the clearest one.
Upload your sizing photo in Step 3 of the order form. I'll use your photo and the coin as a reference scale to custom-cut every nail to your exact measurements.
Feel free to upload 2–3 angles if you're unsure. The more clearly I can see your nail beds, the better the fit!
Here's exactly what your sizing photos should look like.
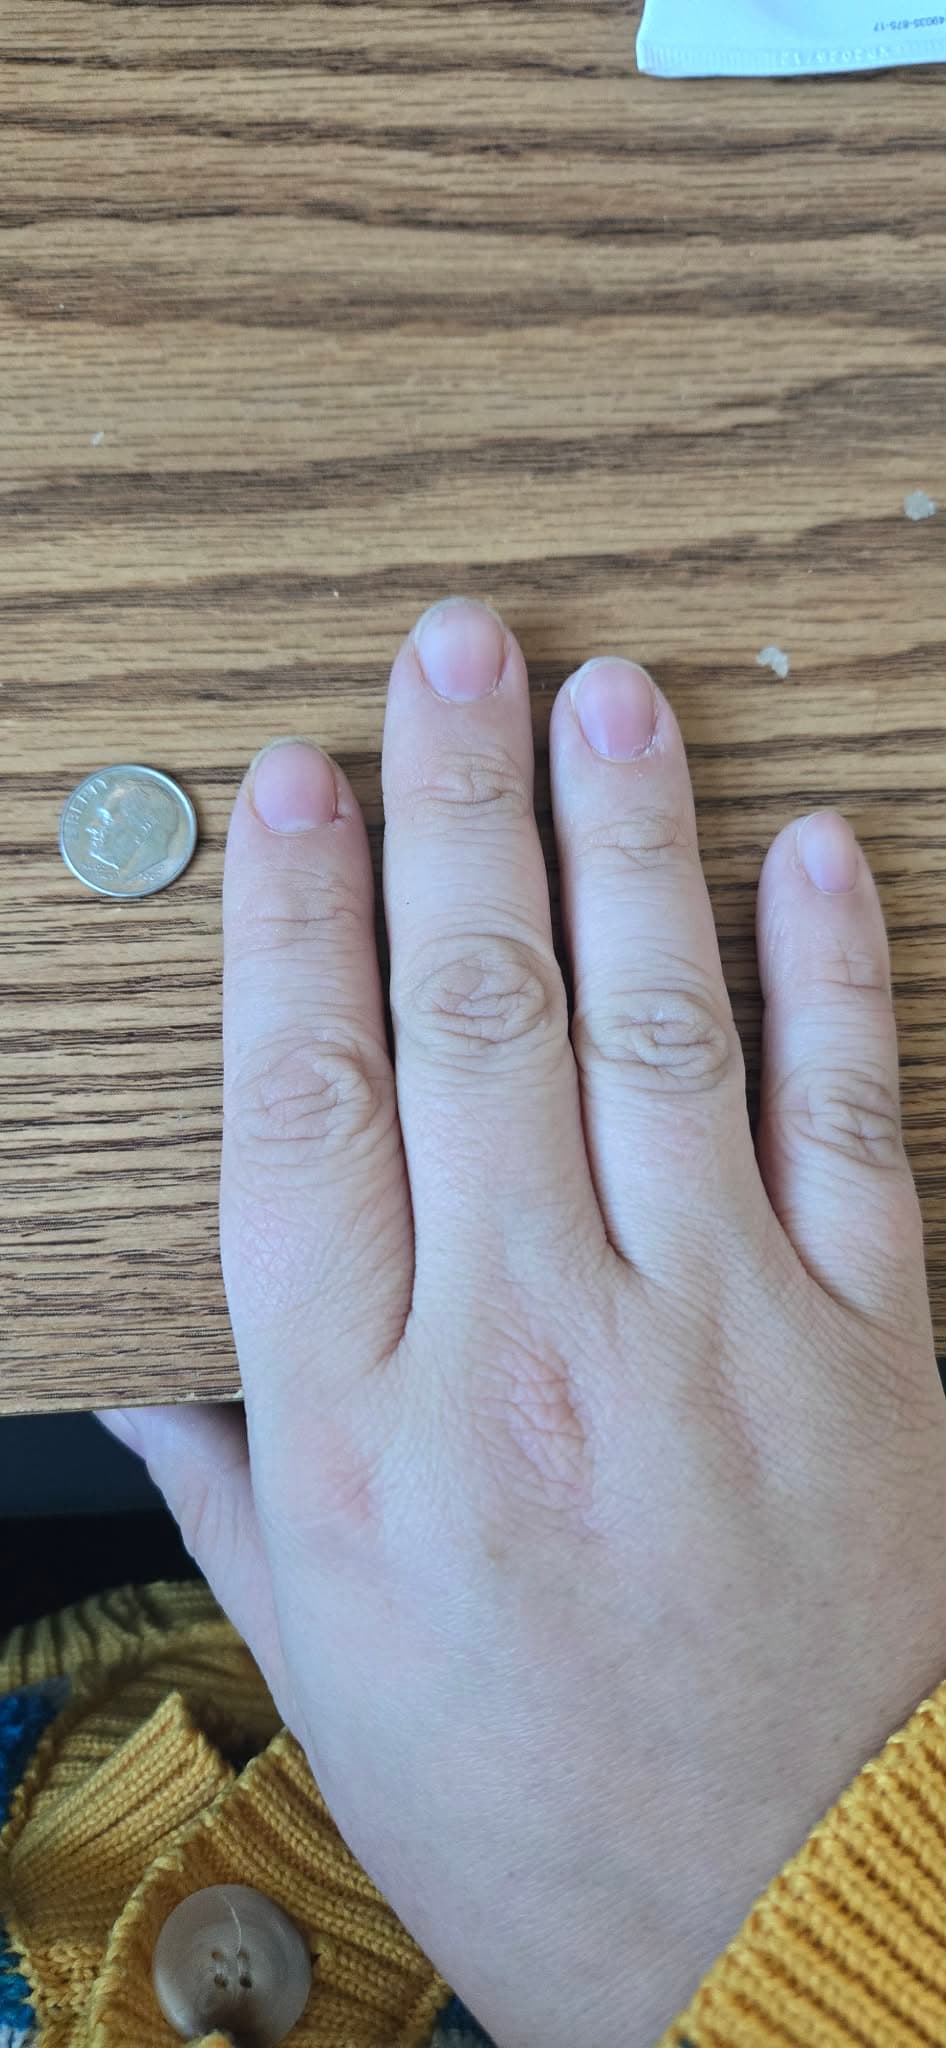
Four fingers flat next to the coin, shot from directly above.

Thumbs photographed separately so they are flat and clearly viewed.
[Diagram: Correct overhead camera angle for sizing photo]
[Diagram: Where to measure — widest point of nail bed]
Download and print to measure your nails at home with ease.
Now that you know how to measure, start your custom set now!
Start Your Custom Set Now!